

Before I get started, I wanted to note a few disclaimers:
- I apologize for the length of this post. There were so many steps in this process it was impossible to keep it short.
- Some of the pictures are kind of garbage which is mainly due to the fact that it now gets dark at 4 pm where I live and I did most of the work in the evenings.
- I will be posting a template with all of the pieces but I’m still working on it.
Ok, here we go…
THE BAKE
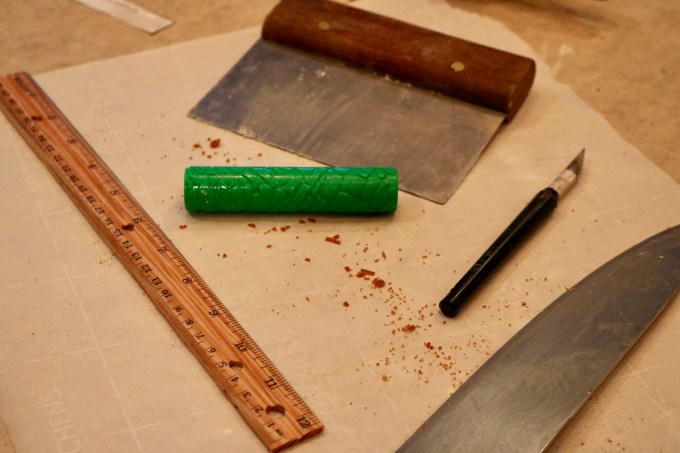
For the dough recipe, I went with Bon Appetit’s Gingerbread House Dough and made one and a half batches which covered all the templates (plus I had a little left over). The process for rolling out the dough and cutting out the pieces using the templates is simple, but time consuming. It is very helpful to have the following supplies at the ready:
- parchment paper
- rolling pin (obviously)
- X-Acto knife for detail work
- I also borrowed a giraffe (?) texture roller from my nephew’s play dough kit to attempt to recreate a cobblestone texture on the exterior pieces. I had varying levels of success with this and also my nephew got mad at me for taking it.

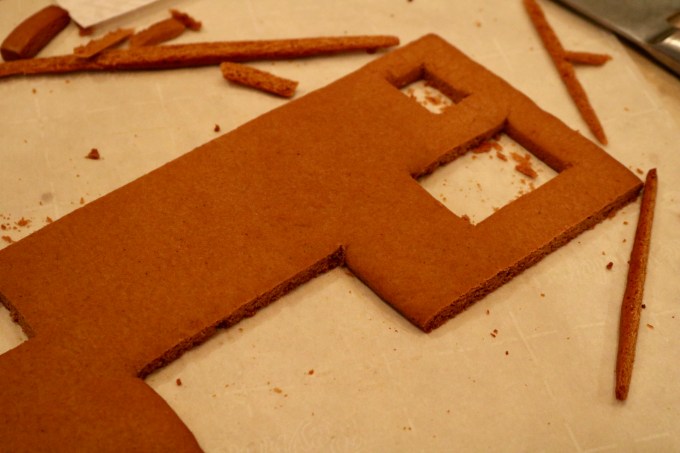
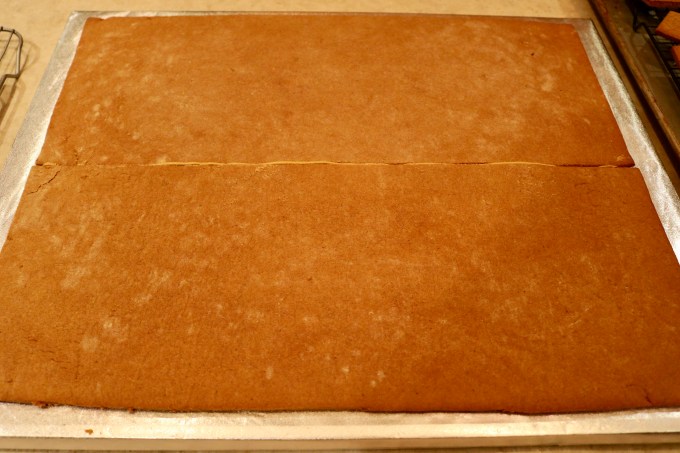
As I said, this process is time consuming but after a while I sort of got into a rhythm with it. It’s a multi-step process. First, roll out the dough to roughly 1/4 inch thickness directly on top of parchment paper which makes transferring the slabs from counter to baking sheet super easy. Roll out the dough, place a template on top, and use a sharp chef’s knife to cut out the shape. For the windows, I used an X-Acto knife to cut through the paper and dough at the same time which I found to work well plus it made me feel like a gingerbread surgeon which I enjoyed. Once you have your shape cut (you may be able to do several on one sheet just don’t place them too close together), lift the parchment onto a baking sheet and bake in a 350° oven for 10-12 minutes. Remove from the oven and then you will essentially be repeating the first step. Slide the parchment back to the counter, place the template over the piece and use a knife/X-Acto to sharpen up any edges that have spread during baking (the dough will be hot so be careful). This is particularly important for the walls or any piece that needs to “fit” with another. Then transfer the cooling piece to a wire rack and leave to finish cooling completely.

THE WINDOWS
I hate sugar work. It is messy and I had to make four batches before I got it right. The first was a blind attempt where I just sort of poured sugar in a saucepan and brought it up to “hard crack” stage but I cooked the sugar too hot so it caramelized and I ended up with brown glass which looked gross. The second time I added some water to the sugar but, again, caramelized it (though this time I had the foresight to throw it away at the stage where the sugar is like sand which is slightly easier clean up than dealing with a molten liquid.) The third time I added some corn syrup and created a big unflavored fruit roll-up. The last time I stuck with the corn syrup but caught it at the right stage which is how I ended up with hard, clear glass. Here are some helpful tools:
- candy thermometer
- Silpat mat
- X-Acto knife
- kitchen torch
Glass Recipe: Combine 1 1/2 cups sugar, 3/4 cup clear corn syrup, and 1/2 cup water in a small saucepan with high sides. Attach candy thermometer to side. Over medium-low heat, bring the mixture up to around 260°, stirring frequently (it will take a little time). I say around 260° because you want to get it to that stage but to know for sure when it’s ready you will drop a small bit of the mixture into a glass of cold water. When it’s ready the mixture will seize up into a hard ball in the water. At this point, pour the mixture out onto a Silpat lined baking tray and tilt the tray from side to side to create an even, thin layer. Let cool completely (if you try to handle the glass to quickly you will a) burn yourself and b) mar the sugar with little stretch marks.)
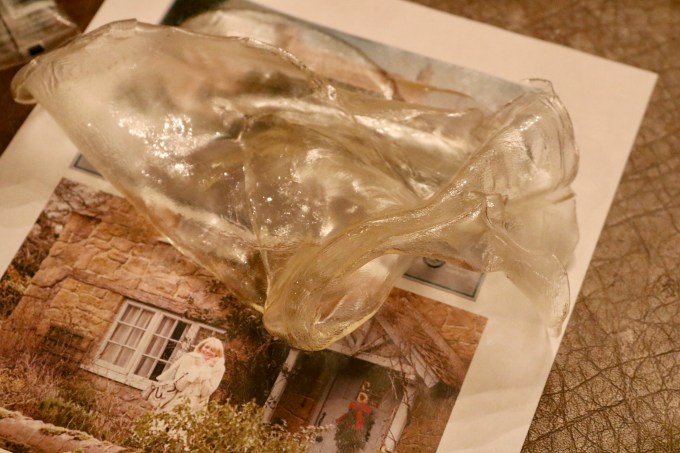
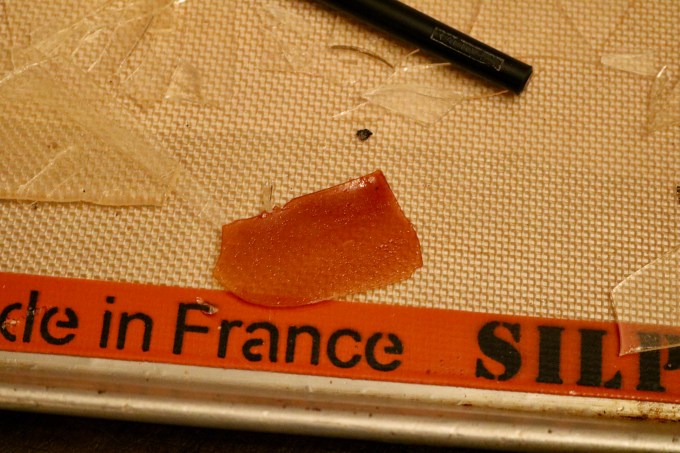
Once the glass is completely cool you can pick it up and drop it and will shatter into tiny pieces. I was able to use the rough shards for all the windows except the back bay window. For this window I had to heat an X-Acto knife with a kitchen torch which allowed me to cut the glass in a 2 x 2 1/4 shape. If at anytime you end up with finger prints on the glass you can clean it up by swiftly wiping the glass with very hot water. It’s like miniature cleaning and I love it.
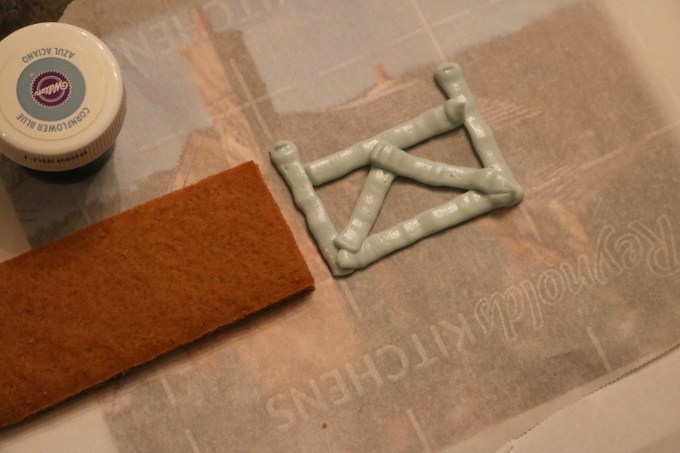
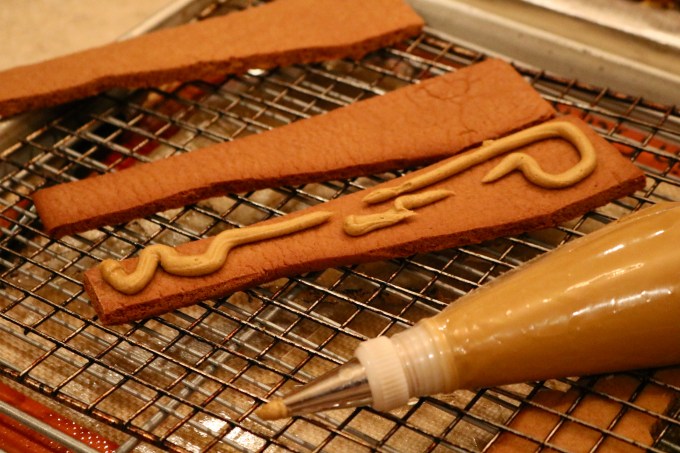
THE TRIM
Beat together 3 1/2 cups of powdered sugar, 2 egg whites, and a pinch of cream of tartar in a mixer. The first batch you will need is the blue color for all of the windows and trim. I think I would describe the color as kind of a slate-y cornflower blue. I was using Wilton gels because it’s what I had and I found I got close by mixing cornflower blue, a tiny moss green, and a teensy bit black but in hindsight I wish I would have tried Americolor® Slate paste.
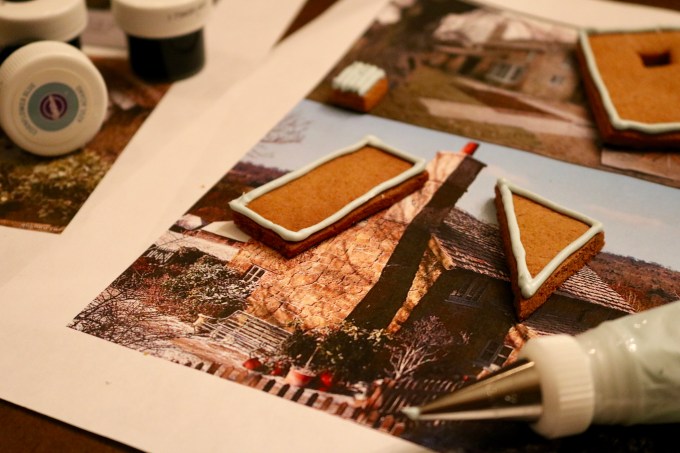
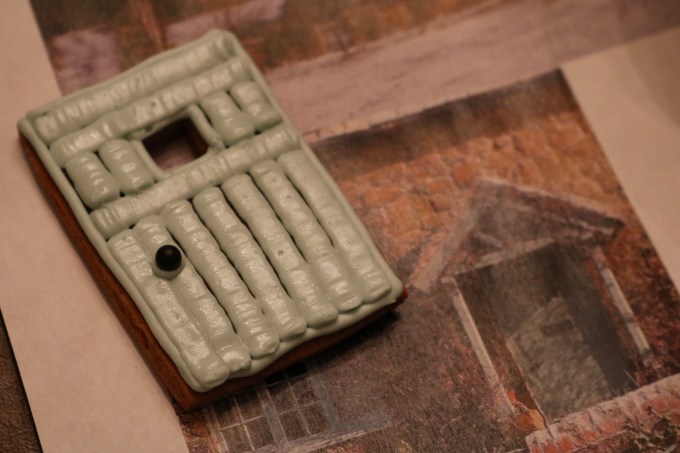
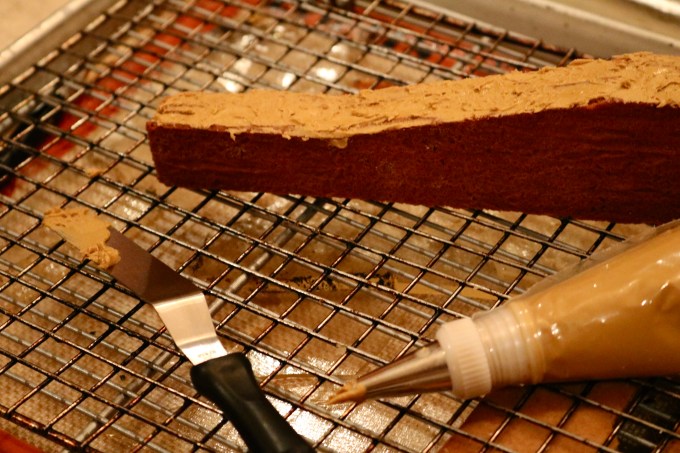
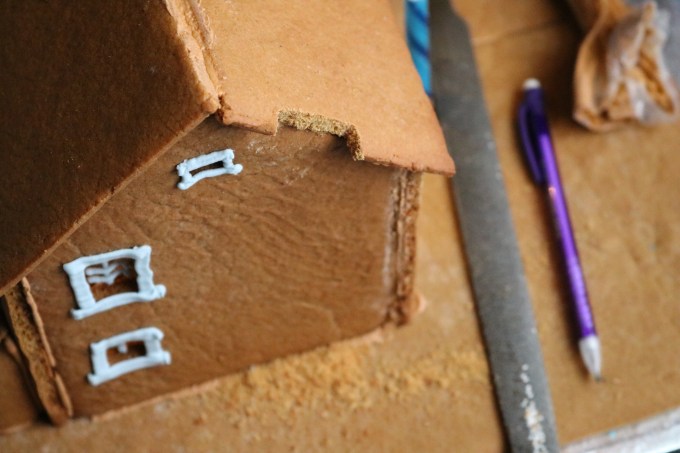
First, I used a small round tip to pipe a border around the front portico, and gate sign. Then I took a spoonful and added a tiny bit more egg white to get a wetter mixture which I put in a squeeze bottle and “flooded” both pieces to get a smooth, even finish. I also dipped the front-facing sides of the portico roof in this wet mix and then propped them up against a glass to dry. Once everything was dry I used a flat tip with the normal, thick mixture to pipe the front and back door, and pattern on the portico. I used a small round tip to pipe the small shutter on the side of the house.
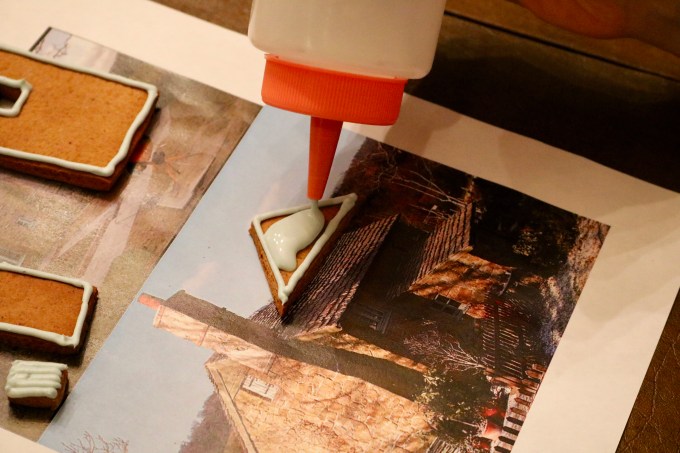
Here is where I would have done things differently. I then attached all the windows by laying the piece down on it’s front, piping some icing around the window and then laying the glass down from the inside. That worked fine but it was a pain to then try and pipe the window muntins once they were set back 1/4 inch (from the outside). If I could do it again, I would have piped the muntins on the glass, then piped around the frame and carefully laid down the glass. I think it would have made my lines a lot cleaner. Once the glass is “installed” and the icing has hardened you can turn each piece around, and lay it flat to pipe (with a flat tip) the sills around the windows.
I also made a blue fence just by piping the icing down onto a piece of parchment paper. It is very fragile and I’m half convinced it will break so I wish I would have made two.
THE ASSEMBLY
Once the pieces are finished and the windows and trim work are done the last step before assembling the house is creating a sturdy base to construct it on. I had my dad cut a 18 x 21 wooden board and then covered the board in silver foil paper that I bought at Michael’s. You will need to make another batch of royal icing (3 1/2 cups powdered sugar, 2 egg whites, and a pinch cream of tartar) but, this time, color it brown (or leave it white if you want that traditional gingerbread look). For the assembly, you will want to have:
- 18 x 21 board of wood, covered in foil wrapping paper
- a pattern maker’s rasp (basically a big file)
- jeweler’s saw
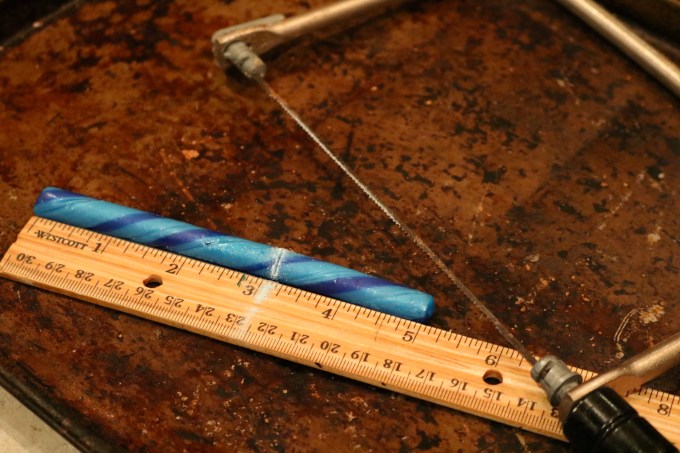
- two candy canes (I used blueberry ones)
- power drill with medium bit (I’m not kidding)
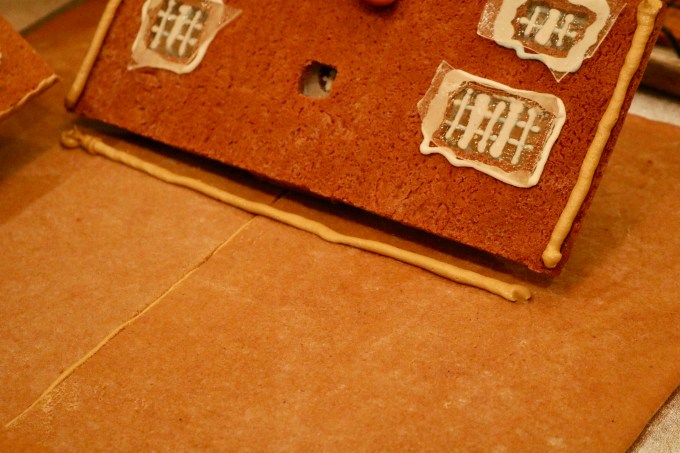
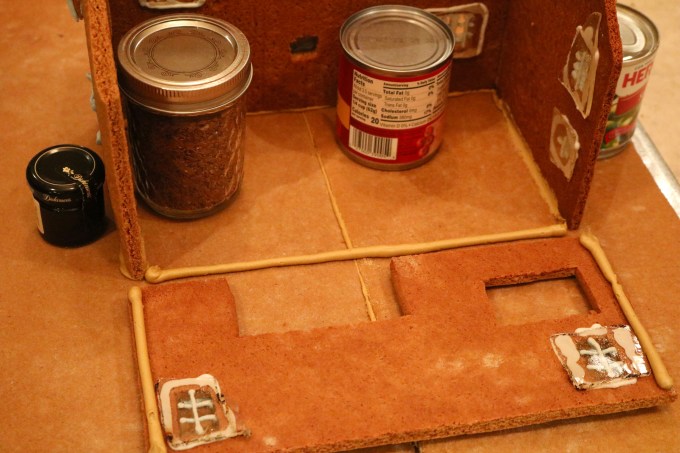
The first thing that I did is get my two large pieces of gingerbread base perfectly straight on one side each so I could push them together and create a foundation for my house to stand on. To do this I pushed each piece up to the side of a flat sheet pan and took it all the way to the edge of a counter and then used the rasp to file down a straight edge. Pipe a little brown icing down onto the covered wooden base, secure the two gingerbread bases on it, and then pipe a bead down the middle and push the two pieces together. Let dry for a few minutes.

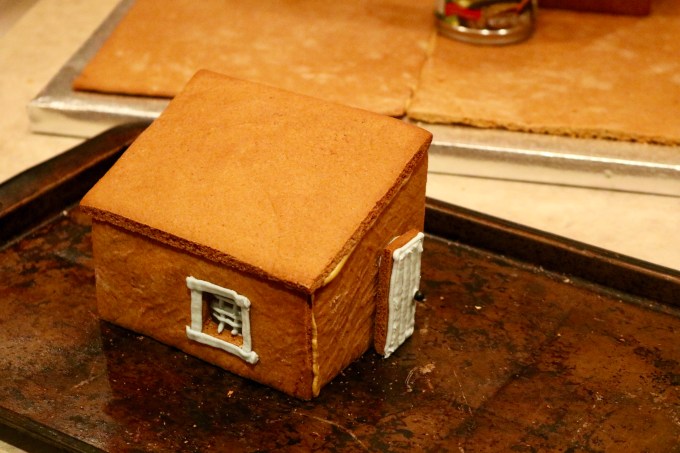
From here the assembly was surprisingly easy. First, the front facade and side went up (you’ll want to pipe each edge during assembly so for this joint I piped the bottom of each piece to secure it to the base and then the side of the piece to join them together). I used some cans and jars to give a little support to each piece after I connected them, but the icing dries surprisingly fast and once it does it becomes rock hard. Still, I waited 24 hours to put the roof on the structure just in case.
Here’s a checklist of the pieces that you will need to assemble:
- Main House (front, back, and sides)
- Two Fence Pieces
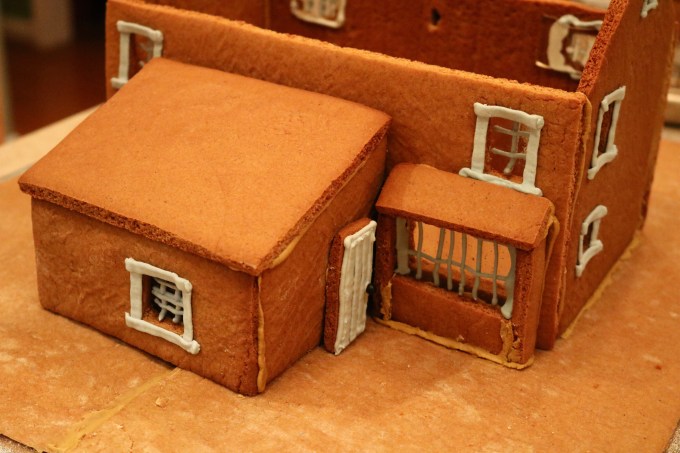
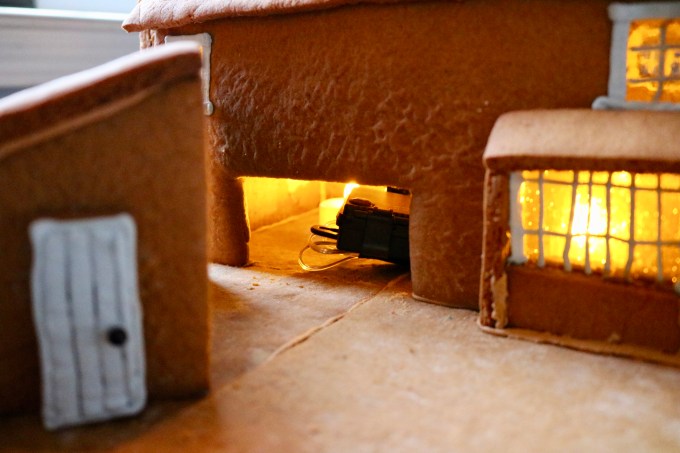
- “Shed”: (roof and three sides) Do NOT attach to house as this is a removable piece that allows access to lighting on the inside.
- Bay Window: (two sides, base, roof, and window) This was honestly the hardest piece to construct and I am least happy with how it turned out. Like I mentioned earlier, you need to get a pretty exact piece of candy glass to fit into the window and so that added some difficulty. My best advice is to join the pieces one at a time and leave a little time to let the icing dry between each addition.
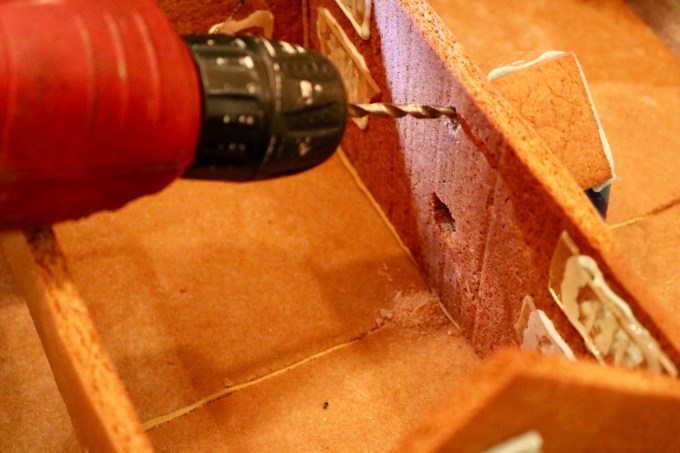
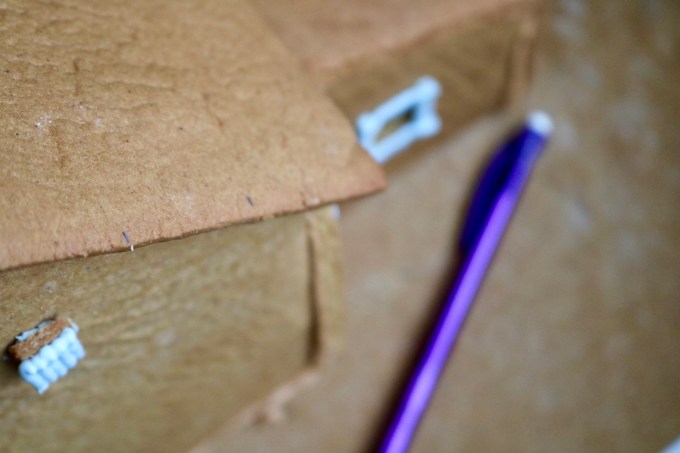
- Portico: Attach one of the triangle pieces directly over the door and let dry for a few minutes. Slowly and carefully drill a whole directly through the center of this triangle, through to the inside of the house (this is for lighting later on). Separately, attach the two roof panels to the decorated front triangle (the one flooded and piped with blue icing). Find a can or jar that is the exact height of the bottom of the triangle. Then, pipe a small bead right on top of the triangle attached to the house and set the other part of the structure on it. Slide the can under the whole thing, allowing the portico to rest on the can while it dries. Once it is dry, use the jeweler’s saw to trim two candy canes to the exact height of the portico and then pipe a bead of icing on the top and bottom and fit them under the portico as pillars.
- Chimneys: The template calls for you to make three identical pieces of chimney (for each chimney, there are two). Lay flat one of the pieces and put some icing all over the flat surface, then lay another of the identical pieces directly on top and press together slightly like your making a chimney sandwich. Repeat with the last piece. Take a small bit of brown icing on a little spatula and frost the sides of each piece to hide the layers. I let mine have a little texture because it’s supposed to be stone. Repeat with the other chimney and then prop them up against something to dry.

We still need to finish assembly, but before the roof goes on we have to put the lighting in place….
THE LIGHTING
You will need:
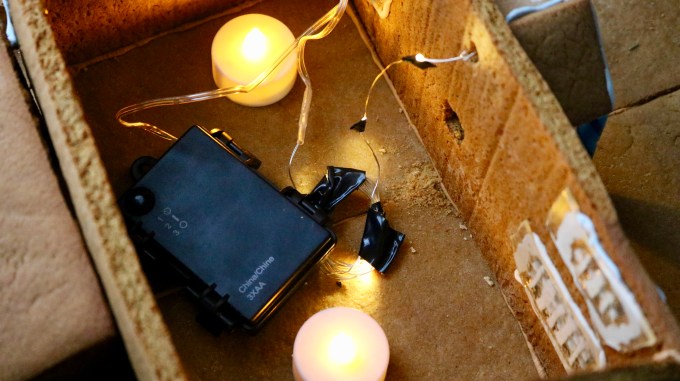
- 2-3 flameless, battery-operated tealights
- a battery-operated set of white wire string lights
- electrical tape
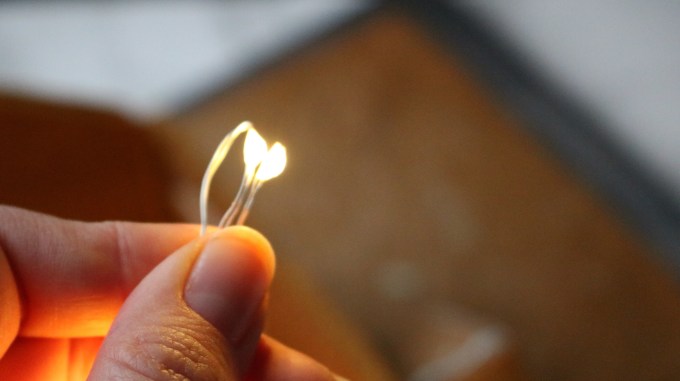
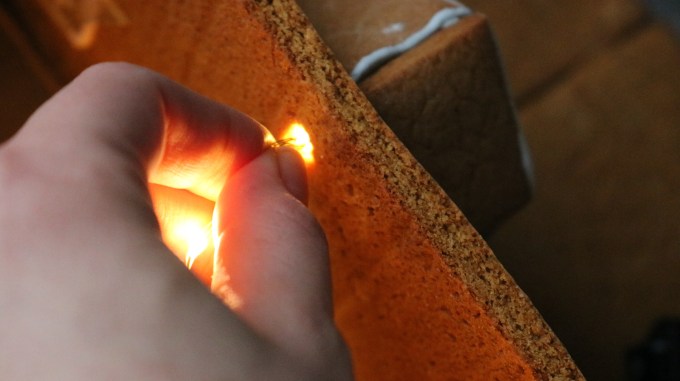
The plan all along was to have two battery-operated tea lights in the house to illuminate it from the inside out and they would be accessible through the removable shed on the back of the house. However, the cottage in the film has an exterior light under the portico and so things had to get a little extra. I took the very end of the wire string set and bent it back on itself so I ended up with two small lights right next to each other. From the inside of the house, I fed the two lights right through the hole I drilled behind the portico. Then I got picky. You could absolutely just use these string lights to light up the house. It’s actually a great solution because you can keep the battery pack in the shed and not even have to slide your hand in the house to press the button. BUT, because I’m trying to stay very original to images from the film, I wanted a warmer light that radiates upward from each of the bottom windows (I told you, EXTRA). And…. since I didn’t particularly like the way the cool light of the wire set mixed with the warm tealights, I used electrical tape to block out all the lights coming from the string set except the ones on the end for the portico light. It legitimately looks like I made a bomb on the inside of this thing but really it’s just in the name of artistic exactness, I promise.
Now that the house is wired, the roof goes on. Pipe a bead all the way around the edges of the top and lay the first roof panel down (line it up evenly with the peak of the house and try to get a similar overhang on each side.) Let it dry for a few minutes, pipe a bead along the peak of the house and then repeat with the other panel. I held both pieces, applying slight but even pressure, for a few minutes to ensure a good bond.
Lastly, we need to attach the chimneys. There is one for each side of the house (they are labeled as such on the template) and you can see their exact positions from pictures of the house. Start by standing the chimney in it’s location up next to the roof (it won’t fit in yet because of the overhang). Take a pencil and mark the roof on either side of the chimney. Set the chimney down and use the rasp to very gently file a notch all the way down until it is flush with the house. You may need to keep filling and adjusting until the chimney sits in the notch, flush with the side of the house. Make a line with a pencil on the flat part of the chimney closest to the house where the roof line is. Pull it away and apply brown icing all over the flat interior side under the pencil line, and on the bottom of the piece. Fit into place and repeat with the other chimney.

Step away. Take a deep breath (and a weekend break) because, as we all know, the devil is in the details and that’s what’s coming up next…
